下载的官方压缩包,压缩包里面没有my.ini
拷贝的原来的5.5的,
把Myisam的参数去掉了,剩下以下这些:
# MySQL Server Instance Configuration File
# ----------------------------------------------------------------------
# Generated by the MySQL Server Instance Configuration Wizard
#
#
# Installation Instructions
# ----------------------------------------------------------------------
#
# On Linux you can copy this file to /etc/my.cnf to set global options,
# mysql-data-dir/my.cnf to set server-specific options
# (@localstatedir@ for this installation) or to
# ~/.my.cnf to set user-specific options.
#
# On Windows you should keep this file in the installation directory
# of your server (e.g. C:\Program Files\MySQL\MySQL Server X.Y). To
# make sure the server reads the config file use the startup option
# "--defaults-file".
#
# To run run the server from the command line, execute this in a
# command line shell, e.g.
# mysqld --defaults-file="C:\Program Files\MySQL\MySQL Server X.Y\my.ini"
#
# To install the server as a Windows service manually, execute this in a
# command line shell, e.g.
# mysqld --install MySQLXY --defaults-file="C:\Program Files\MySQL\MySQL Server X.Y\my.ini"
#
# And then execute this in a command line shell to start the server, e.g.
# net start MySQLXY
#
#
# Guildlines for editing this file
# ----------------------------------------------------------------------
#
# In this file, you can use all long options that the program supports.
# If you want to know the options a program supports, start the program
# with the "--help" option.
#
# More detailed information about the individual options can also be
# found in the manual.
#
#
# CLIENT SECTION
# ----------------------------------------------------------------------
#
# The following options will be read by MySQL client applications.
# Note that only client applications shipped by MySQL are guaranteed
# to read this section. If you want your own MySQL client program to
# honor these values, you need to specify it as an option during the
# MySQL client library initialization.
#
[client]

port=3306

[mysql]

default-character-set=utf8


# SERVER SECTION
# ----------------------------------------------------------------------
#
# The following options will be read by the MySQL Server. Make sure that
# you have installed the server correctly (see above) so it reads this
# file.
#
[mysqld]

# The TCP/IP Port the MySQL Server will listen on
port=3306

#定义时区
default-time-zone='+08:00'

#Path to installation directory. All paths are usually resolved relative to this.
basedir="E:/webhome/mysql-8.0.19"

#Path to the database root
#datadir="C:/Documents and Settings/All Users/Application Data/MySQL/MySQL Server 5.5/Data/"
datadir="E:/webhome/mysql-8.0.19/data"

# The default character set that will be used when a new schema or table is
# created and no character set is defined
character-set-server=utf8

# The default storage engine that will be used when create new tables when
default-storage-engine=INNODB

# The maximum amount of concurrent sessions the MySQL server will
# allow. One of these connections will be reserved for a user with
# SUPER privileges to allow the administrator to login even if the
# connection limit has been reached.
max_connections=100


# 默认使用“mysql_native_password”插件认证
default_authentication_plugin=mysql_native_password
最后一句是加上去的,原来5.5的配置里面没有。
下一步:
输入命令,需要是在管理员模式下,并且切换到bin目录:
mysqld –initialize
执行后,如果没有任何输出,也不报错,可能是因为你没有创建data目录,手动创建一个。
再次执行,会在data目录下生成文件。生成文件很多,如果只有两个文件,那就是遇到错误了。
直接打开data目录下,你的主机名.err的文件,里面有错误描述。
特别注意,再次执行上面命令时,需要删除掉data目录下的文件。
执行后,如果卡顿一段时间,并在data目录下生成文件夹及很多文件,表示成功。这个时候可以执行:
mysqld install
注册服务,注册成功后,用net start mysql启动服务。
启动后,root密码在data目录下,刚才看错误的那个文件中
[Note] [MY-010454] [Server] A temporary password is generated for root@localhost: <o15=l1rTD9l
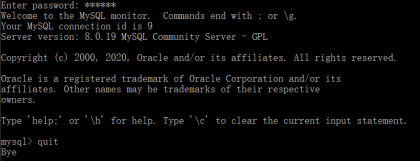
找到这个密码,在命令提示行下登录mysql。
到这里还没完。你登录后,使用Use命令时,会提示:
ERROR 1820 (HY000): You must reset your password using ALTER USER statement before executing this statement.
然后就需要执行命令:
[#zeyu#]
alter user user() identified by "你要设置的新密码";
[/#zeyu#]
这样,就可以使用新密码了。但是如果像我是从5.5升级的,而且还有很多表是MyIsAM的话,就比较麻烦了。目前还未处理。
